Digital Images
I did not download the suggested image resizing software as I already have many image manipulation programs and apps. I deal with images a lot in my work and home life. Image size is a very important consideration and it is very important to be aware of image size, quality and use when determining how to take it and what manipulations you wish to perform. A few additional notes that I’ve learnt by trial and error:
- Red eye reduction works best on original size images (the larger the better)
- Images won’t upload quickly if they are too big and many institutes and companies have a file size limitation on web downloads and e-mail attachments, etc.
- If you want to publish a cover or poster, graphic designers will want as good as quality that you can supply, so always keep the original size if you make an image smaller.
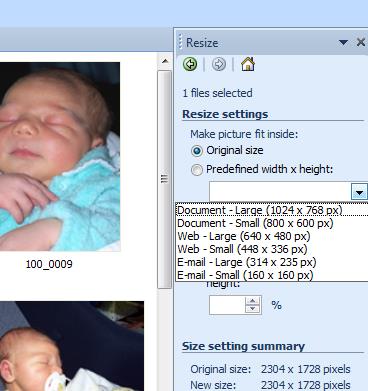
- When imbedding images into documents, PowerPoints and web sites, use as small a file size as needed (most of my image resizing software will give an option of sizing based on the final use, see the screen capture below, Figure 1)
- Many other programs which have the capacity to embed photos will offer a compression function that you can use to resize photos already imbedded, again with the sizing is automatically done based on the final use for the document, presentation, etc. (see screen capture below, Figure 2)

In my teaching field of science the opportunities for using images are countless. Obviously photographs are the most common and can be used to document student participation and experiments that they do. They can also show students examples of animals, plants, ecosystems, chemicals (and their reactions), etc. etc. etc. The list is just too extensive… Photographs are also a key component for the thinking routine of See Think Wonder.
A See Think Wonder routine is where students are asked to observe an image, then they describe the image as: “I see…”, “I think…”, “I wonder…”. This scaffolds the learning of concepts and promotes HOTS (higher order thinking skills).
There are also a lot of other images that are also important and can be very powerful for student learning in the field of science. Charts, diagrams, graphs, figures, and drawings, to name a few, are also essential to facilitate deeper understandings of most scientific concepts. You can tell students that the warmer the pond water the less capacity it has to hold dissolved oxygen, but if you back that up with a graph or a diagram (Figure 3) students get a true understanding of the relationship. You can then move into HOTS as students investigate the relationship between dissolved oxygen and the percent of oxygen saturation (Figure 4).


There are also very powerful lesson that students can get from taking photographs of themselves, classmates and their activities. For visual learners (and I really relate to this) a photograph can really aid students to get to the ‘pointy end’ of Blooms Taxonomy. As learning starts with creativity (taking photographs), evaluating, and analysing it then moves to an understanding and a panicle of remembering. Photographs will aid student (particularly learners with that are sensory learners) to remember what they were doing and learning.
Audio tools
Podcasts… Voki… Recordings… Radio… mp3’s… and so on and so on…There is an immense amount of audio material stored and being up loaded daily. Every kid I know has music on some sort on a digital device and I think that this is the most common form of auditory digital media. And there is no reason why learning can’t tap into this popular culture – how annoying is it when kids have their ears plugged with earphones all day? Why not use that to our advantage??
I enjoyed ‘playing’ with the voki’s and I also downloaded a few voice recorder apps onto my iPad. I found one that I really like called Voice Plus.
Voice Plus records voice as you would expect (as can be heard in my example voki below), but then you can also make the voice different as an alien character, a mouse, an exterminator, a choir and many more, along with this you can add locations so it sounds like you are in a canyon, have an echo, and many more and also add background sounds from the jungle, traffic, scary and helicopters to name a few (an example is below in my podcast example, using the same voice as in the voki with the added embellishments). The kids and I had a lot of fun playing this this app!!

The Voki I made using audo recorded in Voice Plus app
The PodOmatic podcast I made using the Voice Plus app (the same audo recording as the Voki above but with an alien voice, echo and jungle noises)
But want are the pros and cons of this? Since I have mainly focused on PMI’s so far, I thought I would consider a SWOT analysis to further investigate this form of product for learning…
|
Strengths
It’s just soooooooo easy to do!!
Can be published on line
Can be about anything, anywhere, anytime
Can be done by the teacher and the students
|
Weaknesses
Some people, like me, really don’t like recording
their voices (I just don’t like the sound of it – weird I know, but I can’t
be alone)
The recording can be compromised if it is
recorded in a noisy environment – and it’s difficult to fix after the fact
|
|
Opportunities
You can subscribe to any of a million
(personal opinion, no reference for this figure) different podcasts that are
available on the internet.
You can use these podcasts to enhance
learning and spark an interest with students
The podomatic site I tested has a link with
iTunes that you or your students (depending who is the audience) can link to
and new podcasts will automatically download!!
|
Threats
As with all technological tools you need to
be very careful to keep the focus of the task on the learning outcome – you
can get very distracted with playing and having fun (which is GREAT!!), but
might not do the job
Be sure to use the technology responsibly
in a safe, legal and ethical!!
|
Videos
My husband got a Sony Action Cam for Christmas!! As you can imagine, we have hours and hours of video footage from the view of our helmets, our bikes, the canoe, the jet ski, the surf ski, and the trampoline, and… and… and…
What a great tool for learning!!!
With the video technology of today there are no boundaries to what you can bring to the class room in a video form. And then there are countless sites where you can download and/or watch videos from the internet – the most infamous of course is YouTube (which even features in our course material…).
I have experience with editing video footage and have included a condensed clip of a much longer piece I made with a work colleague (thanks Adam Rose!!), as an example of the kind of production you can make with an action camera and a summers afternoon.
I also assisted my 7 year old to make a video as an experiment to see just how user friendly common movie making software is for our emerging ‘digital natives’. The project (below) demonstrates how a simple combination of photographs and audio (coincendently
To reflect on this project, I felt a KWL analysis to be fitting:
What I know:
- Making videos are fun and relatively easy
- But can also be very (VERY) time-consuming
- Videos are very engaging for students
- Just how to link the wealth of material available on the internet to the curriculum objectives
What I learnt:
- YouTube is not allowed in state schools – will have to investigate what is allowed in my school (when I get one…)
- Students will need to exhibit HOTS to produce videos
- Equipment could be outside the reach of school budgets
Note: All photographs, recordings and video of children in this blog have been used with the consent of their parent or guardian (aka myself).
No comments:
Post a Comment